A Complete Guide on Valve Installation: Butterfly Valve Bolt Chart
On this page
Butterfly valves play a crucial role in controlling the flow of liquids and gases via pipelines, making them essential components of numerous industrial processes. The main component of butterfly valves, bolts ensure both the structural integrity and the tightness of the sealing. Butterfly valve bolt charts are a very useful tool for valve engineers and installers. By providing crucial information on bolt sizes, materials, and torque values, these charts ensure accurate and trustworthy valve installation. By utilizing these charts as a guide, professionals may select the correct bolts, apply the proper torque, and guarantee a secure and effective valve system.
We shall get into the specifics of the butterfly valve bolt in this article. The significance of butterfly valve bolt charts and how they can help with a successful valve installation will be discussed in this article. We will go over each component of the butterfly valve, provide you with a detailed breakdown of the sizes and kinds of nuts and bolts, and walk you through the installation procedure step-by-step. In addition, misconceptions about torque and its significance as well as tips for preserving the integrity of bolts and valve safety will be discussed.
First, let's go over the fundamental components of a butterfly valve before delving into the specifics of butterfly valve bolt charts. The components of a standard butterfly valve are the actuator, seat, stem, disc, and body. The primary housing of the pipeline valve is called the body. The media flow valve is opened and closed by the spinning of the disc that is attached to the stem. To prevent leaks, the seat fits tightly between the disc and the body. The last part that moves the disc is the actuator, which can be pneumatic, electric, or manual.
Each of the components listed above is essential to the butterfly valve's correct operation. Two of the most crucial parts that are used to secure the valve to the pipeline flanges are the bolts and the valve body. They will also shield the valve from leaks and damage and prevent the seat from coming off. The most crucial factor in obtaining a dependable and effective valve system is the interplay between these components as well as the necessity of careful bolt selection and installation.
Bolt charts for butterfly valves provide comprehensive guidance on which bolts to use when installing your valve. These charts typically include information about the bolt's diameter, length, composition, and thread type. The most common bolt sizes for butterfly valves are 1/2 to 1-1/2 inches in diameter; the length of the bolts varies according to the size of the valve and the thickness of the flange.
Carbon steel and stainless steel are the two most popular types of bolt materials. Bolts made of stainless steel offer exceptional resistance to corrosion and are suitable for use in severe environments or in media corrosion situations. Because of their low cost and great strength, carbon steel bolts are widely employed in general purpose applications. The intended purpose of the valve, the media to be treated, and the surrounding conditions determine the type of bolt material.
Two short tables that show several bolt and butterfly valve types are provided below:
Table 1: Specifications and Torque of Various Bolt Types
The Manufacturers Standardization Society (MSS) SP-67: Butterfly Valves, the American Water Works Association (AWWA) C504: Rubber-Seated Butterfly Valves, and ASME B16.5: Pipe Flanges and Flanged Fittings are among the industry standards and manufacturer recommendations from which the information in these tables originates. Note that these numbers are only recommendations; for best performance and safety, always consult the bolt chart that the valve manufacturer specifically provides for your specific valve model and application.
We will now go over the bolt sizes and components of butterfly valves in brief before using the butterfly valve bolt chart to guide us through a step-by-step installation procedure. To ensure optimal performance, dependability, and safety, butterfly valve installation must be done correctly. By following these steps and making use of the bolt guide, you may accomplish a successful installation that will also offer reliable long-term service.
To determine the appropriate bolt size and length for your valve and flange, first refer to the butterfly valve bolt chart. The recommended bolt diameter for each valve size, pressure rating, and flange type will be shown on the chart. It is important to select bolts that are compatible with both the material of the valve and the medium that is being treated. Make sure the bolts are the right grade of stainless steel, for example, if you are screwing in a stainless steel valve in a corrosive environment.
Second, get the flanges and valve ready for installation. Make sure the flange faces are clean and free of damage, dust, and dirt by wiping them off. Check for wear and flaws on the disc and the valve body. Replace any broken parts if necessary before continuing with the installation. Orient the valve such that the bolt holes line up between the flanges. Make sure the valve is oriented correctly and in the center of the flow.
Put the bolts through the holes and use washers to tighten the nuts. Maintaining the cross-tightening pattern will provide uniform compression and keep leaks from happening. Start by gradually increasing the torque while manually tightening the bolts in a crisscross manner. For the recommended torque value based on the valve size and material you want to use, please refer to the bolt table. To ensure that every bolt is tightened to the prescribed value, it is advised to use a torque wrench that has been calibrated in order to attain the correct tightness degree.
In the end, tighten every bolt to the first torque figure and double-check by retightening each bolt to the entire torque provided. This phase enables the removal of any relaxation or compression that might have occurred during the initial tightness. After the installation is finished, it is crucial to test the valve to make sure there are no leaks and it is operating well. To ensure that the disc properly seats against the valve body and to assess how smoothly the valve moves, open and close it multiple times.
You will be able to guarantee a dependable and safe installation with the help of these detailed instructions and the butterfly valve bolt chart. Keep in mind that safety comes first, and that while doing your installation, you should always utilize the appropriate tools and safety clothing. Regular maintenance and inspection of the bolted connections and valve will extend the equipment's service life and maintain its efficiency throughout.
One important component that influences installing butterfly valves correctly is torque. It achieves this by applying a torque to the bolts that is sufficient to prevent leakage from the valve body between the pipeline flanges.
When tightening the bolts, use a crisscross pattern. Because the force is distributed uniformly, the impact of the energy is not able to harm the valve body or flanges. Start by progressively increasing the torque as you tighten the bolts in a crisscross pattern until you achieve the desired final tightening amount. This process makes it possible to build a strong seal and reduces the likelihood of leaks or damage to the valve components.
The inefficiency and safety concerns would result from either overtightening or undertightening the bolts. An excessive amount of torque might result in the flange being bent, the bolts straining, or the gasket being crushed. If there is not enough torque, the joint may leak or fracture while under strain. The torque settings recommended in the butterfly valve bolt chart must be adhered to. Don't make any changes to the equipment that might make the system less reliable.
Maintaining a strong bolted connection and preventing leaks or failures requires routine torque checks and re-tightening according to manufacturer instructions. Over extended periods of time, the bolts may lose some of their initial tightness. Variables like temperature swings, vibrations, or the material settling might cause these variations. If you see any loosening of the part, you should inspect it often and tighten the bolts again. Additionally, doing so will guarantee that the valve is firmly fastened to the pipelines.
You can make a dependable, leak-free connection by utilizing the recommended numbers in the bolt table and understanding how crucial torque is when installing butterfly valves. The requirements of your application will be met by this connection. Use a calibrated torque wrench at all times. Observe the proper pattern for tightening. For maintenance and re-tightening, follow the manufacturer's instructions. By doing this, you can make sure that your installation of a butterfly valve functions well and is safe for a long period.
Even if a butterfly valve bolt chart is a great tool for installation, it's important to know the common pitfalls to avoid making a reliable and successful valve setup. Using the incorrect bolt size or material is among the most common errors. Choose the right bolts by always double-checking the bolt chart that corresponds to your valve and application. Small or large bolts may be used, and this could lead to leaks or structural problems.
Not understanding the recommended torque numbers or the tightening procedure is another mistake. Inadequate torque application can result in loose nuts, damaged gaskets, and uneven compression. Utilizing a torque wrench that has been calibrated, apply the proper amount of torque while according to the bolt chart's cross-tightening sequence. Furthermore, galling or seizing might result from lubricating the bolts improperly or not at all, which will make removal and maintenance more challenging in the future. Refer to the valve manufacturer's specifications for recommended lubricants that are appropriate for the bolt type and application.
For the bolted connections and valves to last a long time and remain safe, proper maintenance is essential. To find any corrosion, damage, or leaks, routine inspections must be performed. As soon as possible, the compromised bolts should be replaced with new bolts that match the bolt chart's specifications for size and substance.
Retightening bolts on a regular basis is recommended, particularly following initial installation and when maintenance is scheduled. Bolts loosen with time due to thermal cycling, vibrations, and other operating conditions. To make sure the recommended torque levels are maintained, adhere to the manufacturer's recommendations for re-tightening intervals and use a torque wrench that has been calibrated. Precise documentation of bolt replacements, torque assessments, and maintenance tasks facilitates monitoring valve performance and identifying any current issues.
Having the appropriate equipment and materials on hand is crucial for achieving an exact and flawless installation. To ensure that the torque values are applied precisely each and every time, a torque wrench that has been calibrated should be an essential instrument. Utilizing digital torque wrenches with pre-programmed values can further simplify the procedure and lower the possibility of human error.
In addition to the tangible instruments, it's critical to have a reliable source of knowledge. The precise instructions needed for each valve model and application are provided by the manufacturers' installation manuals, bolt charts, and technical datasheets. General norms and practices for valve installation and maintenance are provided by industry standards, such as those produced by the Manufacturers Standardization Society (MSS) and the American Society of Mechanical Engineers (ASME).
Q: Which butterfly valve chart is best for figuring out my valve's bolt size?
A: It goes without saying that the type, size, pressure rating, and material of the valve determine which butterfly valve bolt chart to utilize. To find the correct bolt chart for your valve, always refer to the manufacturer's literature or get in touch with their technical assistance. Inadequate torque numbers and improper bolting selection might result in a leak or valve failure when choosing the incorrect bolt charts.
Q:Is it possible to use bolts that are not made by the same company as the valve?
A: In order to guarantee that the valve will function as intended and to prevent voiding the warranty, it is strongly advised to use the bolts that the manufacturer specifies. A bolt created by a different manufacturer can have the incorrect size, not enough strength, or be composed of materials that aren't compatible. If you must purchase bolts from another source, make sure they meet all requirements, including size, grade, material, and thread type, as listed in the butterfly valve bolt chart.
Q: What consequences result from bolts that are either too tight or too loose?
A: Some problems, such as bolt giving or failure, flange deformation, gasket damage, or seat distortion, might result from overtightening the bolts. These flaws could make the valve less capable of sealing, result in leaks, or possibly cause the valve to fail entirely. On the other hand, if the bolts are not tightened enough, there could be inadequate compression, gasket leakage, or joint loosening throughout the operation. To avoid those impacts, always tighten to the torque levels listed on the bolt chart.
Q: How many times after the initial installation must I re-tighten the bolts?
A number of variables, such as the application of the valve, the operating environment, temperature variations, and vibration intensity, influence how frequently a valve needs to be re-torqued. It is advised that the bolts be re-tightened as a general rule following the initial installation and during routine maintenance. The precise recommendations for the frequency of re-tightening the valve should be included in the manufacturer's guidelines, taking into account the valve model and service conditions. Remember that excessive re-tightening might lead to bolt fatigue or damage, so pay close attention to the manufacturer's guidelines.
Q: If I disassemble the valve for repair, can I use the bolts again?
A: Generally speaking, after disassembling the valve, the bolts shouldn't be used again for assembly. During installation and aftercare maintenance, bolts may experience strain, wear and tear, or other problems. It is crucial to remember that reusing old or broken bolts puts the joint at significant danger of leaks or failures. Always use brand-new bolts that match the specifications listed in the butterfly valve bolt chart, including size, grade, and material. This ensures that the bolts have the necessary strength and functionality for a reliable and secure installation.
Q: Will operating the equipment in an unsafe manner result from not following the bolt chart's recommended tightening sequence?
A uniform compression and prevent gasket damage or flange distortion, the tightening procedure specified in the butterfly valve bolt chart must be followed. In order to prevent stress concentrations and disperse the load evenly, the suggested sequence is introduced. Inaccurate execution of the process could lead to leaks, an uneven torque, or an early failure. If you have any questions concerning the order in which the bolts should be tightened or if a particular scenario is not addressed in the spanner chart, get in touch with the valve's maker.
Q: If I inadvertently misplace or break the butterfly valve bolt chart, how can I get it back?
A: You must get in touch with the valve maker right away to obtain a replacement if you misplace or break the butterfly valve bolt chart. Avoid installing the valve without using the proper bolt chart since this may lead to improper bolt selection, insufficient torque values, and valve failure. Bolt charts are usually made available by manufacturers via their technical support staff or on their websites. Remember to save the bolt chart in a safe and convenient location so you can refer to it later.
This will help you comprehend the frequently asked questions and their responses, which will make it easier for you to navigate the intricate details of butterfly valve bolt charts. Safety should always come first, and in order to complete a successful and dependable valve installation, it is important to follow the manufacturer's instructions and use the right tools and techniques. Do not be afraid to seek professional assistance and recommendations from the valve maker or a trained expert if you encounter any unforeseen conditions or have specific problems.
We shall get into the specifics of the butterfly valve bolt in this article. The significance of butterfly valve bolt charts and how they can help with a successful valve installation will be discussed in this article. We will go over each component of the butterfly valve, provide you with a detailed breakdown of the sizes and kinds of nuts and bolts, and walk you through the installation procedure step-by-step. In addition, misconceptions about torque and its significance as well as tips for preserving the integrity of bolts and valve safety will be discussed.
First, let's go over the fundamental components of a butterfly valve before delving into the specifics of butterfly valve bolt charts. The components of a standard butterfly valve are the actuator, seat, stem, disc, and body. The primary housing of the pipeline valve is called the body. The media flow valve is opened and closed by the spinning of the disc that is attached to the stem. To prevent leaks, the seat fits tightly between the disc and the body. The last part that moves the disc is the actuator, which can be pneumatic, electric, or manual.
Each of the components listed above is essential to the butterfly valve's correct operation. Two of the most crucial parts that are used to secure the valve to the pipeline flanges are the bolts and the valve body. They will also shield the valve from leaks and damage and prevent the seat from coming off. The most crucial factor in obtaining a dependable and effective valve system is the interplay between these components as well as the necessity of careful bolt selection and installation.
Bolt charts for butterfly valves provide comprehensive guidance on which bolts to use when installing your valve. These charts typically include information about the bolt's diameter, length, composition, and thread type. The most common bolt sizes for butterfly valves are 1/2 to 1-1/2 inches in diameter; the length of the bolts varies according to the size of the valve and the thickness of the flange.
Carbon steel and stainless steel are the two most popular types of bolt materials. Bolts made of stainless steel offer exceptional resistance to corrosion and are suitable for use in severe environments or in media corrosion situations. Because of their low cost and great strength, carbon steel bolts are widely employed in general purpose applications. The intended purpose of the valve, the media to be treated, and the surrounding conditions determine the type of bolt material.
Two short tables that show several bolt and butterfly valve types are provided below:
Table 1: Specifications and Torque of Various Bolt Types
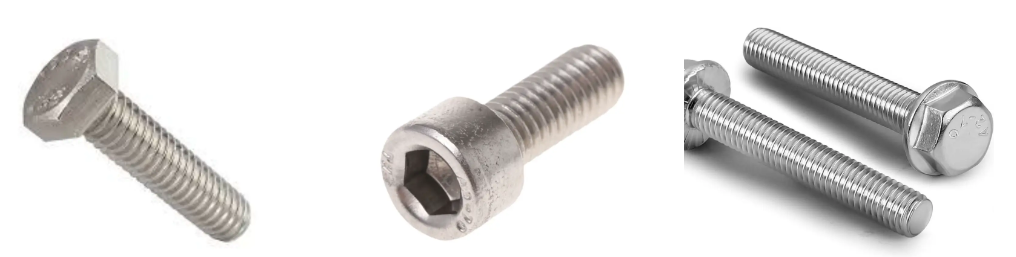
| Bolt Type | Size Range | Torque Range (ft-lbs) |
| Hex Head | 1/2″ – 1″ | 30 – 150 |
| 1-1/8″ – 1-1/2″ | 200 – 600 | |
| Socket Head | 1/2″ – 1″ | 30 – 150 |
| 1-1/8″ – 1-1/2″ | 200 – 600 | |
| Hex Flange | 1/2″ – 1″ | 30 – 150 |
| 1-1/8″ – 1-1/2″ | 200 – 600 |
Table 2: Bolt Specifications for Different Butterfly Valve Sizes
| Valve Type | Valve Size (inches) | Bolt Size | Quantity | Torque (ft-lbs) |
| Wafer | 2 | 1/2 | 4 | 30 – 50 |
| 3 | 1/2 | 4 | 30 – 50 | |
| 4 | 5/8 | 8 | 60 – 90 | |
| 6 | 3/4 | 8 | 100 – 150 | |
| 8 | 3/4 | 8 | 100 – 150 | |
| 10 | 7/8 | 12 | 200 – 300 | |
| 12 | 7/8 | 12 | 200 – 300 | |
| Lug | 2 | 1/2 | 4 | 30 – 50 |
| 3 | 1/2 | 4 | 30 – 50 | |
| 4 | 5/8 | 8 | 60 – 90 | |
| 6 | 3/4 | 8 | 100 – 150 | |
| 8 | 3/4 | 8 | 100 – 150 | |
| 10 | 7/8 | 12 | 200 – 300 | |
| 12 | 7/8 | 12 | 200 – 300 | |
| Flanged | 2 | 5/8 | 4 | 60 – 90 |
| 3 | 5/8 | 4 | 60 – 90 | |
| 4 | 5/8 | 8 | 60 – 90 | |
| 6 | 3/4 | 8 | 100 – 150 | |
| 8 | 3/4 | 8 | 100 – 150 | |
| 10 | 7/8 | 12 | 200 – 300 | |
| 12 | 7/8 | 12 | 200 – 300 |
We will now go over the bolt sizes and components of butterfly valves in brief before using the butterfly valve bolt chart to guide us through a step-by-step installation procedure. To ensure optimal performance, dependability, and safety, butterfly valve installation must be done correctly. By following these steps and making use of the bolt guide, you may accomplish a successful installation that will also offer reliable long-term service.
To determine the appropriate bolt size and length for your valve and flange, first refer to the butterfly valve bolt chart. The recommended bolt diameter for each valve size, pressure rating, and flange type will be shown on the chart. It is important to select bolts that are compatible with both the material of the valve and the medium that is being treated. Make sure the bolts are the right grade of stainless steel, for example, if you are screwing in a stainless steel valve in a corrosive environment.
Second, get the flanges and valve ready for installation. Make sure the flange faces are clean and free of damage, dust, and dirt by wiping them off. Check for wear and flaws on the disc and the valve body. Replace any broken parts if necessary before continuing with the installation. Orient the valve such that the bolt holes line up between the flanges. Make sure the valve is oriented correctly and in the center of the flow.
Put the bolts through the holes and use washers to tighten the nuts. Maintaining the cross-tightening pattern will provide uniform compression and keep leaks from happening. Start by gradually increasing the torque while manually tightening the bolts in a crisscross manner. For the recommended torque value based on the valve size and material you want to use, please refer to the bolt table. To ensure that every bolt is tightened to the prescribed value, it is advised to use a torque wrench that has been calibrated in order to attain the correct tightness degree.
In the end, tighten every bolt to the first torque figure and double-check by retightening each bolt to the entire torque provided. This phase enables the removal of any relaxation or compression that might have occurred during the initial tightness. After the installation is finished, it is crucial to test the valve to make sure there are no leaks and it is operating well. To ensure that the disc properly seats against the valve body and to assess how smoothly the valve moves, open and close it multiple times.
You will be able to guarantee a dependable and safe installation with the help of these detailed instructions and the butterfly valve bolt chart. Keep in mind that safety comes first, and that while doing your installation, you should always utilize the appropriate tools and safety clothing. Regular maintenance and inspection of the bolted connections and valve will extend the equipment's service life and maintain its efficiency throughout.
One important component that influences installing butterfly valves correctly is torque. It achieves this by applying a torque to the bolts that is sufficient to prevent leakage from the valve body between the pipeline flanges.
When tightening the bolts, use a crisscross pattern. Because the force is distributed uniformly, the impact of the energy is not able to harm the valve body or flanges. Start by progressively increasing the torque as you tighten the bolts in a crisscross pattern until you achieve the desired final tightening amount. This process makes it possible to build a strong seal and reduces the likelihood of leaks or damage to the valve components.
The inefficiency and safety concerns would result from either overtightening or undertightening the bolts. An excessive amount of torque might result in the flange being bent, the bolts straining, or the gasket being crushed. If there is not enough torque, the joint may leak or fracture while under strain. The torque settings recommended in the butterfly valve bolt chart must be adhered to. Don't make any changes to the equipment that might make the system less reliable.
Maintaining a strong bolted connection and preventing leaks or failures requires routine torque checks and re-tightening according to manufacturer instructions. Over extended periods of time, the bolts may lose some of their initial tightness. Variables like temperature swings, vibrations, or the material settling might cause these variations. If you see any loosening of the part, you should inspect it often and tighten the bolts again. Additionally, doing so will guarantee that the valve is firmly fastened to the pipelines.
You can make a dependable, leak-free connection by utilizing the recommended numbers in the bolt table and understanding how crucial torque is when installing butterfly valves. The requirements of your application will be met by this connection. Use a calibrated torque wrench at all times. Observe the proper pattern for tightening. For maintenance and re-tightening, follow the manufacturer's instructions. By doing this, you can make sure that your installation of a butterfly valve functions well and is safe for a long period.
Even if a butterfly valve bolt chart is a great tool for installation, it's important to know the common pitfalls to avoid making a reliable and successful valve setup. Using the incorrect bolt size or material is among the most common errors. Choose the right bolts by always double-checking the bolt chart that corresponds to your valve and application. Small or large bolts may be used, and this could lead to leaks or structural problems.
Not understanding the recommended torque numbers or the tightening procedure is another mistake. Inadequate torque application can result in loose nuts, damaged gaskets, and uneven compression. Utilizing a torque wrench that has been calibrated, apply the proper amount of torque while according to the bolt chart's cross-tightening sequence. Furthermore, galling or seizing might result from lubricating the bolts improperly or not at all, which will make removal and maintenance more challenging in the future. Refer to the valve manufacturer's specifications for recommended lubricants that are appropriate for the bolt type and application.
For the bolted connections and valves to last a long time and remain safe, proper maintenance is essential. To find any corrosion, damage, or leaks, routine inspections must be performed. As soon as possible, the compromised bolts should be replaced with new bolts that match the bolt chart's specifications for size and substance.
Retightening bolts on a regular basis is recommended, particularly following initial installation and when maintenance is scheduled. Bolts loosen with time due to thermal cycling, vibrations, and other operating conditions. To make sure the recommended torque levels are maintained, adhere to the manufacturer's recommendations for re-tightening intervals and use a torque wrench that has been calibrated. Precise documentation of bolt replacements, torque assessments, and maintenance tasks facilitates monitoring valve performance and identifying any current issues.
Having the appropriate equipment and materials on hand is crucial for achieving an exact and flawless installation. To ensure that the torque values are applied precisely each and every time, a torque wrench that has been calibrated should be an essential instrument. Utilizing digital torque wrenches with pre-programmed values can further simplify the procedure and lower the possibility of human error.
In addition to the tangible instruments, it's critical to have a reliable source of knowledge. The precise instructions needed for each valve model and application are provided by the manufacturers' installation manuals, bolt charts, and technical datasheets. General norms and practices for valve installation and maintenance are provided by industry standards, such as those produced by the Manufacturers Standardization Society (MSS) and the American Society of Mechanical Engineers (ASME).
Q: Which butterfly valve chart is best for figuring out my valve's bolt size?
A: It goes without saying that the type, size, pressure rating, and material of the valve determine which butterfly valve bolt chart to utilize. To find the correct bolt chart for your valve, always refer to the manufacturer's literature or get in touch with their technical assistance. Inadequate torque numbers and improper bolting selection might result in a leak or valve failure when choosing the incorrect bolt charts.
Q:Is it possible to use bolts that are not made by the same company as the valve?
A: In order to guarantee that the valve will function as intended and to prevent voiding the warranty, it is strongly advised to use the bolts that the manufacturer specifies. A bolt created by a different manufacturer can have the incorrect size, not enough strength, or be composed of materials that aren't compatible. If you must purchase bolts from another source, make sure they meet all requirements, including size, grade, material, and thread type, as listed in the butterfly valve bolt chart.
Q: What consequences result from bolts that are either too tight or too loose?
A: Some problems, such as bolt giving or failure, flange deformation, gasket damage, or seat distortion, might result from overtightening the bolts. These flaws could make the valve less capable of sealing, result in leaks, or possibly cause the valve to fail entirely. On the other hand, if the bolts are not tightened enough, there could be inadequate compression, gasket leakage, or joint loosening throughout the operation. To avoid those impacts, always tighten to the torque levels listed on the bolt chart.
Q: How many times after the initial installation must I re-tighten the bolts?
A number of variables, such as the application of the valve, the operating environment, temperature variations, and vibration intensity, influence how frequently a valve needs to be re-torqued. It is advised that the bolts be re-tightened as a general rule following the initial installation and during routine maintenance. The precise recommendations for the frequency of re-tightening the valve should be included in the manufacturer's guidelines, taking into account the valve model and service conditions. Remember that excessive re-tightening might lead to bolt fatigue or damage, so pay close attention to the manufacturer's guidelines.
Q: If I disassemble the valve for repair, can I use the bolts again?
A: Generally speaking, after disassembling the valve, the bolts shouldn't be used again for assembly. During installation and aftercare maintenance, bolts may experience strain, wear and tear, or other problems. It is crucial to remember that reusing old or broken bolts puts the joint at significant danger of leaks or failures. Always use brand-new bolts that match the specifications listed in the butterfly valve bolt chart, including size, grade, and material. This ensures that the bolts have the necessary strength and functionality for a reliable and secure installation.
Q: Will operating the equipment in an unsafe manner result from not following the bolt chart's recommended tightening sequence?
A uniform compression and prevent gasket damage or flange distortion, the tightening procedure specified in the butterfly valve bolt chart must be followed. In order to prevent stress concentrations and disperse the load evenly, the suggested sequence is introduced. Inaccurate execution of the process could lead to leaks, an uneven torque, or an early failure. If you have any questions concerning the order in which the bolts should be tightened or if a particular scenario is not addressed in the spanner chart, get in touch with the valve's maker.
Q: If I inadvertently misplace or break the butterfly valve bolt chart, how can I get it back?
A: You must get in touch with the valve maker right away to obtain a replacement if you misplace or break the butterfly valve bolt chart. Avoid installing the valve without using the proper bolt chart since this may lead to improper bolt selection, insufficient torque values, and valve failure. Bolt charts are usually made available by manufacturers via their technical support staff or on their websites. Remember to save the bolt chart in a safe and convenient location so you can refer to it later.
This will help you comprehend the frequently asked questions and their responses, which will make it easier for you to navigate the intricate details of butterfly valve bolt charts. Safety should always come first, and in order to complete a successful and dependable valve installation, it is important to follow the manufacturer's instructions and use the right tools and techniques. Do not be afraid to seek professional assistance and recommendations from the valve maker or a trained expert if you encounter any unforeseen conditions or have specific problems.